
Introduction to Dill Pickles
Making homemade dill pickles connects us to traditional food preservation methods that date back centuries. The satisfaction of creating your own crisp, flavorful homemade dill pickles is unmatched by any store-bought version.
The Origin and History of Dill Pickles
Pickling has been a food preservation method for thousands of years, dating back to ancient Mesopotamia around 2400 BCE. Dill pickles specifically have their roots in Eastern Europe and the Middle East, where dill herb was readily available and naturally paired with cucumbers. The word “pickle” comes from the Dutch “pekel” or German “pökel,” referring to the brine solution used in the process.
By the 17th century, Dutch and German immigrants brought their pickling traditions to North America, where dill pickles became particularly popular. The classic homemade dill pickles we know today—featuring the distinctive flavor of dill weed and garlic—became a staple in Jewish delis in New York City in the late 19th and early 20th centuries, often served from large wooden barrels.
Popularity and Cultural Significance
Dill pickles have transcended their humble beginnings to become cultural icons. In the United States, pickles are consumed at a rate of about 9 pounds per person annually, with dill varieties being among the most popular. They’re fixtures at summer barbecues, essential components of burgers and sandwiches, and even star in their own food festivals across the country.
Beyond America, dill pickles hold special significance in Eastern European and Russian cuisine, where they’re served as appetizers, sides, and even in soups like Polish pickle soup (zupa ogórkowa). In Jewish cuisine, half-sour dill pickles remain an important cultural food, particularly in kosher delis. The distinct tangy crunch of well-made homemade dill pickles has made them not just a food, but a cultural touchstone that represents tradition, preservation, and distinctive flavor.
Understanding the Pickling Process
Creating homemade dill pickles requires understanding the fundamental science of pickling and the transformation that occurs during the preservation process.
What is Pickling?
Pickling is a preservation method that extends the shelf life of food by immersing it in an acidic solution or creating conditions for natural fermentation. This process not only preserves the food but also transforms its flavor, texture, and nutritional profile. While many foods can be pickled—from eggs to watermelon rinds—cucumbers remain the most common and beloved pickled item in Western cuisine.
The process involves creating an environment that inhibits the growth of harmful bacteria while either encouraging beneficial bacteria (in fermentation) or using acid (typically vinegar) to preserve the food. The result is a product that can last months or even years beyond its fresh counterpart’s shelf life.
The Science Behind Pickling: Fermentation vs. Vinegar Brining
There are two primary methods of pickling: fermentation and vinegar brining.
Fermentation: This traditional method involves creating an environment where beneficial lactic acid bacteria (naturally present on cucumber skin) can thrive. These bacteria consume sugars in the cucumber and produce lactic acid, which acts as a natural preservative. The process takes time—typically 1-3 weeks—but creates complex flavors and probiotic benefits. The environment is created using salt brine, which selectively allows good bacteria to grow while inhibiting harmful ones.
Vinegar Brining: This quicker method uses pre-made acetic acid (vinegar) to create an immediate acidic environment. Cucumbers are submerged in a vinegar solution, often with added salt, sugar, and spices. This method doesn’t develop the same complex flavors as fermentation but provides reliable results in a fraction of the time—sometimes ready in as little as 24 hours for refrigerator pickles.
Both methods rely on maintaining a low pH (acidic environment) to prevent the growth of botulism and other harmful bacteria.
Essential Ingredients for Pickling
Successful homemade dill pickles require surprisingly few ingredients:
- Cucumbers: The foundation of your pickle, ideally fresh and specifically grown for pickling.
- Salt: Preferably pickling or kosher salt without anti-caking agents or iodine, which can cloud the brine and affect flavor.
- Water: Clean, filtered water works best; chlorinated tap water can inhibit fermentation.
- Vinegar: For vinegar brining, white distilled vinegar or apple cider vinegar are common choices. The vinegar should have 5% acidity for safe preservation.
- Dill: The signature flavor, used either as fresh dill weed, dill seed, or often both.
- Garlic: Provides depth and complexity to the flavor profile.
- Spices: Typically mustard seeds, black peppercorns, red pepper flakes, and occasionally coriander seeds.
- Crisp-enhancing additives: Optional ingredients like grape leaves, oak leaves, or calcium chloride that help maintain crispness.
The beauty of pickling lies in its simplicity—these basic ingredients create a canvas for endless flavor variations in your homemade dill pickles.
Selecting the Right Cucumbers for Pickling
The foundation of exceptional homemade dill pickles begins with selecting the right cucumbers. This choice is perhaps the most critical factor in determining the quality of your finished product.

Types of Cucumbers Suitable for Pickling
Not all cucumbers are created equal when it comes to pickling. The best varieties include:
Kirby Cucumbers: These small, bumpy cucumbers are the gold standard for pickling. They have thinner skin, fewer seeds, and firmer flesh that holds up well during the pickling process.
Persian Cucumbers: Smaller than standard slicing cucumbers with minimal seeds, these make excellent pickles with a tender crunch.
Boston Pickling Cucumbers: As the name suggests, these were specifically developed for pickling, featuring the ideal size and texture.
Armenian Cucumbers: These long, ribbed cucumbers make interesting spears and have a naturally sweet flavor that pairs well with dill.
Avoid standard slicing cucumbers found in most grocery stores, as they tend to be waxed, have too many seeds, and often become mushy when pickled.
Tips for Choosing Fresh Cucumbers
For the crispest homemade dill pickles, cucumber selection is crucial:
- Freshness is paramount: Select cucumbers harvested within the past 24-48 hours if possible. Farmers’ markets during cucumber season (summer) are ideal sources.
- Look for firmness: The cucumber should feel solid with no soft spots or wrinkles.
- Size matters: Choose cucumbers between 3-5 inches long for whole pickles. Uniformity in size ensures even pickling.
- Avoid yellowing: A cucumber turning yellow is overripe and will likely produce soft pickles.
- Check the blossom end: The blossom end (opposite the stem) contains enzymes that can soften pickles. Either select cucumbers with the blossom end intact (so you can remove it precisely) or find ones where it’s already been trimmed properly.
- Consider growing your own: For pickle enthusiasts, growing pickling cucumbers ensures the freshest possible product and allows harvesting at the perfect stage.
Remember, the quality of your cucumbers directly affects the quality of your finished homemade dill pickles—it’s worth being selective at this stage.
Classic Homemade Dill Pickles Recipe
This tried-and-true recipe will help you create delicious homemade dill pickles with consistent results every time.
Ingredients Needed
For a basic gallon of dill pickles (about 4 quart jars):
the brine:
- 8 cups water
- 4 cups white vinegar (5% acidity)
- 1/2 cup pickling salt
each quart jar:
- 8-10 pickling cucumbers (depending on size)
- 3-4 fresh dill heads or 1 tablespoon dill seeds
- 2-3 cloves of garlic, peeled
- 1 tablespoon mixed pickling spices (typically includes mustard seeds, coriander seeds, black peppercorns, and red pepper flakes)
- 1 grape leaf or oak leaf (optional, for crispness)
- 1/4 teaspoon calcium chloride (optional alternative for crispness)
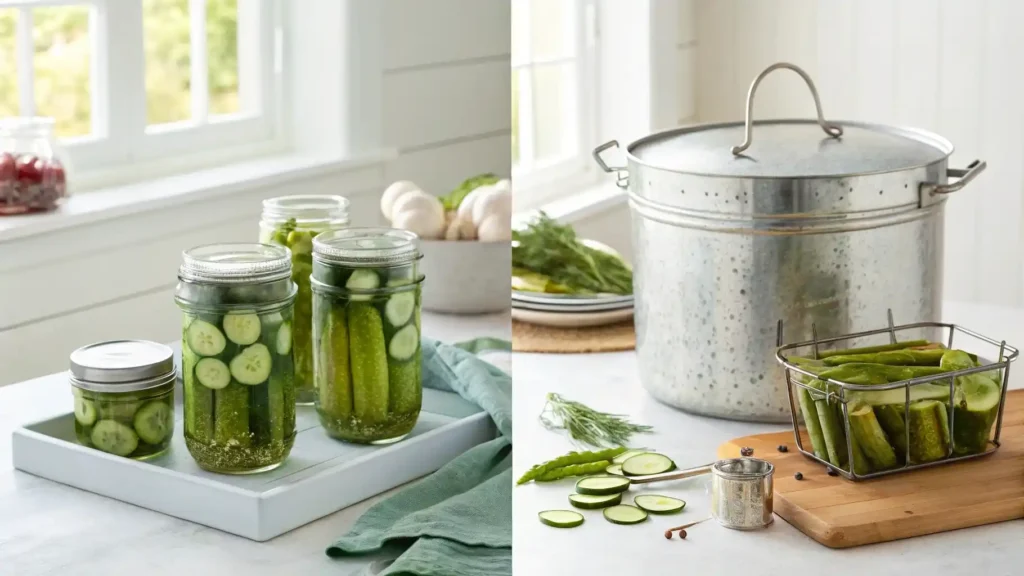
Equipment:
- 4 quart-sized mason jars with lids and bands
- Large pot for preparing brine
- Canning pot with rack
- Jar lifter
- Canning funnel
- Clean kitchen towels
Step-by-Step Preparation Guide
Preparation:
- Wash cucumbers thoroughly, scrubbing gently with a vegetable brush.
- Trim 1/8 inch off the blossom end of each cucumber (this removes enzymes that can cause softening).
- If making spears, cut cucumbers into quarters lengthwise. For slices, cut into 1/4-inch rounds.
- Sterilize jars and lids by washing in hot, soapy water and rinsing well. Keep jars hot until ready to use.
For Refrigerator Pickles (Quick Method):
- In a large pot, combine water, vinegar, and salt. Bring to a boil, stirring to dissolve salt.
- Place dill, garlic, and spices in the bottom of each clean jar.
- Pack cucumbers tightly into jars, leaving 1/2 inch headspace at the top.
- Pour hot brine over cucumbers, covering completely but still leaving 1/4 inch headspace.
- Tap jars gently to remove air bubbles.
- Wipe jar rims clean and apply lids and bands, tightening just until finger-tight.
- Allow jars to cool to room temperature, then refrigerate.
- Wait at least 48 hours before eating (longer for better flavor development).
- Store in refrigerator for up to 2 months.
For Shelf-Stable Canned Pickles:
- Follow steps 1-6 above.
- Process jars in a boiling water bath: 10 minutes for pints, 15 minutes for quarts (adjust for altitude if necessary).
- Remove jars and allow to cool undisturbed for 24 hours.
- Check seals (lids should be depressed in center and not flex when pressed).
- Store sealed jars in a cool, dark place for up to a year.
- Allow pickles to cure for at least 2 weeks before eating for best flavor.
Alternative Ingredients and Variations
Spicy Dill Pickles: Add 1-2 sliced jalapeños or 1/2 teaspoon red pepper flakes to each jar.
Garlic Dill Pickles: Double or triple the amount of garlic for a more pronounced flavor.
Sweet Dill Pickles: Add 1/4 cup sugar to the brine for a subtle sweetness that balances the tartness.
Bread and Butter Dill: Incorporate 1 cup of sugar and 1 tablespoon of turmeric to the brine for a sweet-and-tangy hybrid.
Dill Pickle Spears with Onion: Add 1/4 sliced onion to each jar for additional flavor complexity.
Herb Variations: Experiment by adding fresh herbs like thyme, bay leaves, or tarragon along with the dill.
Vinegar Variations: Substitute up to half of the white vinegar with apple cider vinegar for a different flavor profile.
Remember that any deviation from tested recipes when canning may affect food safety, particularly regarding acidity levels. Experimental variations are best made as refrigerator pickles unless you’re experienced with canning and pH testing.
Ensuring Crisp and Flavorful Pickles
The most common question about homemade dill pickles is how to ensure they stay crisp. Here are expert tips to achieve that perfect crunch.
The Secret to Crisp Dill Pickles
Achieving that perfect crunch is often considered the holy grail of pickle-making. Here are the key factors that contribute to crisp pickles:
1. Fresh, Firm Cucumbers: Start with just-picked cucumbers. The fresher they are, the crisper your pickles will be. Cucumbers begin to soften the moment they’re harvested, so timing is crucial.
2. Remove the Blossom End: The blossom end contains enzymes that accelerate softening. Always trim it off before pickling.
3. Ice Bath Soak: Soak cucumbers in ice water for 4-5 hours before pickling to help firm them up.
4. Proper Salt Concentration: For fermented pickles, a 5% salt solution (about 3 tablespoons salt per quart of water) creates the optimal environment for crispness.
5. Low Temperature Processing: If canning, keep the processing time to the minimum required for safety. Prolonged heat exposure will soften pickles.
6. Cold Pack Method: For refrigerator pickles, pour hot brine over cucumbers in jars, rather than cooking the cucumbers in the brine.
7. Pre-Salting: For sliced cucumbers, tossing them with salt and letting them sit for 1-2 hours before rinsing and packing into jars can help draw out excess moisture.
8. Add Tannins: Incorporate ingredients containing natural tannins, which help preserve crispness.
9. Limit Headspace: Ensure cucumbers are fully submerged in brine but packed tightly enough that they don’t float and become partially exposed.
Role of Additives like Grape Leaves or Alum
Several traditional and modern additives can help maintain pickle crispness:
Grape Leaves: Contain natural tannins that inhibit the cucumber’s softening enzymes. One or two leaves per quart jar can make a noticeable difference. Other leaves with similar effects include oak, horseradish, or cherry leaves.
Calcium Chloride: Sold under brand names like Ball® Pickle Crisp®, this modern alternative to alum firms the pectin in cucumber cell walls. Use about 1/4 teaspoon per quart jar.
Alum (Aluminum Potassium Sulfate): A traditional additive that helps maintain crispness. However, it’s less commonly used now due to concerns about aluminum consumption and because it’s not as effective as once thought. If using, limit to 1/4 teaspoon per quart.
Pickle Crisp® or Similar Products: Commercial products designed specifically for maintaining crispness in pickles. Follow manufacturer instructions for proper usage.
Food-Grade Lime (Calcium Hydroxide): Used in some traditional recipes for soaking cucumbers before pickling. If using this method, the lime must be thoroughly rinsed off before proceeding with the pickling process.
It’s worth noting that while these additives can help, they’re not magic solutions. The freshness of your cucumbers and proper technique will always be the most important factors in achieving crisp homemade dill pickles.
Different Pickling Methods
There are several approaches to making homemade dill pickles, each with unique advantages. The method you choose depends on your timeline, equipment, and storage capabilities.
Refrigerator (Quick) Pickles
Refrigerator pickles, also known as “quick pickles,” are the easiest entry point into pickle-making. These pickles are preserved by vinegar and refrigeration rather than traditional canning methods.
Advantages:
- Ready to eat in as little as 24-48 hours
- No special canning equipment needed
- Lower risk of foodborne illness compared to fermented pickles
- Maintains crispness better than heat-processed pickles
- More vibrant flavor of fresh herbs and spices
Basic Process:
- Prepare cucumbers as desired (whole, spears, or slices)
- Pack into clean jars with desired spices and herbs
- Pour a heated vinegar brine solution over the cucumbers
- Seal jars and refrigerate
- Let flavors develop for at least 24 hours before eating
Storage Considerations:
- Keeps for 1-2 months in the refrigerator
- Always use clean utensils when removing pickles from jar
- Quality begins to decline after about 2 months
Best For:
- Beginners
- Small
Classic Homemade Dill Pickles
Equipment
- 4 quart-sized mason jars with lids and bands
- Large pot for preparing brine
- Canning pot with rack (optional, for shelf-stable pickles)
- Jar lifter (optional, for canning)
- Canning funnel
- Clean kitchen towels
Ingredients
- For the Brine:
- 8 cups water
- 4 cups white vinegar 5% acidity
- 1/2 cup pickling salt
- Per Quart Jar:
- 8-10 pickling cucumbers 3-5 inches long
- 3-4 fresh dill heads or 1 tablespoon dill seeds
- 2-3 cloves garlic peeled
- 1 tablespoon mixed pickling spices mustard seeds, coriander seeds, black peppercorns, red pepper flakes
- 1 grape leaf or oak leaf optional, for crispness
- 1/4 teaspoon calcium chloride optional, for crispness
Instructions
- Prepare the Cucumbers:
- Wash cucumbers thoroughly and trim 1/8 inch off the blossom end.
- Cut into spears or slices, if desired.
- Sterilize Jars:
- Wash jars and lids in hot, soapy water and rinse well. Keep jars hot until ready to use.
- Make the Brine:
- In a large pot, combine water, vinegar, and salt. Bring to a boil, stirring to dissolve the salt.
- Pack the Jars:
- Place dill, garlic, and spices in the bottom of each jar.
- Pack cucumbers tightly into jars, leaving 1/2 inch headspace at the top.
- Add Brine:
- Pour hot brine over cucumbers, covering them completely but leaving 1/4 inch headspace.
- Tap jars gently to remove air bubbles.
- Seal and Store:
- Wipe jar rims clean and apply lids and bands, tightening until finger-tight.
- For refrigerator pickles, let jars cool to room temperature, then refrigerate for at least 48 hours before eating.
- For shelf-stable pickles, process jars in a boiling water bath for 10-15 minutes, then let cool undisturbed for 24 hours.
- Enjoy:
- Wait at least 48 hours for flavors to develop. Store in the refrigerator or a cool, dark place.
Notes
- Cucumber Selection: For the crispiest pickles, use fresh, firm pickling cucumbers like Kirby or Persian varieties. Avoid overripe or waxed cucumbers.
- Blossom End Removal: Always trim the blossom end of the cucumber to prevent enzymes from causing softening.
- Crispness Tips: Add tannin-rich leaves (grape, oak, or cherry) or calcium chloride to maintain crunch.
- Safety First: When canning, always follow tested recipes and proper sterilization techniques to prevent foodborne illnesses.
- Flavor Development: Pickles taste best after at least 48 hours of resting. For fermented pickles, allow 1-3 weeks for full flavor development.
- Experiment: Feel free to adjust spices and herbs to suit your taste, but avoid altering vinegar or salt ratios in canning recipes for safety.
Frequently Asked Questions (FAQs) About Homemade Dill Pickles
Possible Causes: Overripe cucumbers, improper trimming of the blossom end, or prolonged heat exposure during processing.
Solution: Use fresh, firm cucumbers; trim the blossom end; add tannin-rich leaves (grape, oak) or calcium chloride; and reduce processing time if canning.
Answer: It’s best to avoid table salt because it often contains anti-caking agents and iodine, which can cloud the brine and affect flavor. Use pickling salt, kosher salt, or sea salt without additives.
Answer:
Refrigerator pickles: 1-2 months in the fridge.
Fermented pickles: Several months in the fridge.
Canned pickles: Up to 1 year in a cool, dark place (once opened, refrigerate and consume within 2 months).
Answer: Reusing brine is not recommended for safety reasons, as it may contain bacteria or diluted acidity. However, you can use it as a flavoring agent in dressings or marinades if used immediately.
Possible Causes: Hard water, impurities in salt, or bacterial growth during fermentation.
Solution: Use filtered water, pure pickling salt, and ensure proper sterilization of equipment. Cloudiness in fermented pickles is normal and harmless if there’s no foul smell or mold.
Conclusion
Homemade dill pickles are a rewarding and delicious way to preserve fresh cucumbers while connecting with centuries-old food traditions. Whether you choose the quick refrigerator method, the probiotic-rich fermentation process, or the shelf-stable canning technique, making your own pickles allows you to control the ingredients and customize flavors to your liking.
The key to success lies in selecting fresh, high-quality cucumbers, following proper techniques, and understanding the science behind pickling. With a little practice, you can achieve the perfect balance of crispness, tanginess, and dill flavor that makes homemade dill pickles so irresistible.